Sweet Success of Sweet Potato Pie

This morning I couldn’t wait to head down to the pantry and grab two more jars of my pressure canned sweet potatoes.  All failures aside, I had to find out if these potatoes were pie-worthy or not.

I had a recipe for sweet potato pie that I’d used in the past, but the sweet potato had always been very firm.  Not wanting the pie to come out soupy, I decided to compare my sweet potato pie recipe to my pumpkin pie recipe.  I freeze pumpkin puree in the fall and when I defrost and add it to the other pie ingredients it is super runny, almost like water.  That being the case, there must be something in that recipe that pulls the ingredients together.

There were very few differences between these two recipes except for the amount of eggs and the sweet potato pie called for butter while the pumpkin pie called for evaporated milk.  Aside from adding instant tapioca to pull the ingredients together, I had no idea if eliminating the butter or adding evaporated milk would make any difference, but what could it hurt.  I adjusted the recipe and made the pie.

Deep Dish Sweet Potato Pie

IMG_3559

  • 3 Cups Mashed Sweet Potatoes (this was 2 quarts of mine from the pantry)
  • 1 Cup Evaporated Milk
  • 1 1/2 Cups Sugar
  • 3/4 Cup Whole Milk
  • 3 Eggs
  • 3/4 tsp. each Nutmeg and Cinnamon
  • 1 1/2 tsp. Vanilla
  • 1 Unbaked Pie Crust

Drain sweet potatoes and put in large bowl.  Mash slightly.  Add remaining ingredients and whisk until well combined.  Pour mixture into crust-lined deep pie dish.

Bake at 400 for 1 hour 15 minutes.

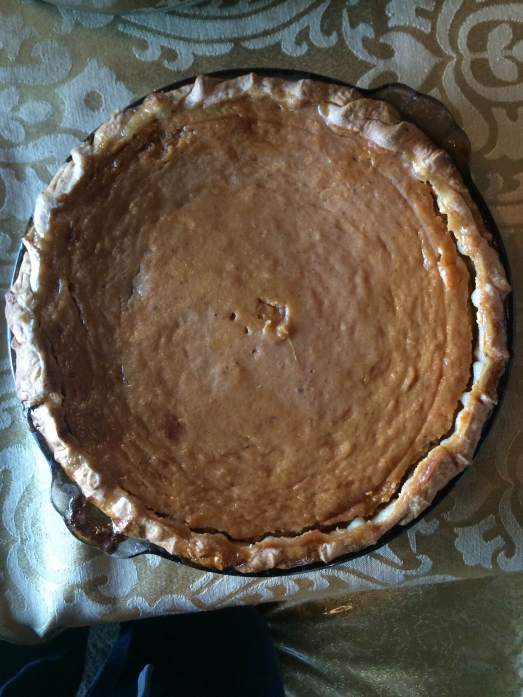
Hubby had some after dinner tonight and gave me the thumbs up, he’d have said something, but he was too busy shoveling another bite into his mouth.  When he did finally come up for air, when I was cutting his second piece, he told me it was “really good,” the only comment was that it could be colder.  It had been in the fridge all afternoon, but being a deep dish pie, the center was still warm. He said it was not watery in the least.  I knew this already because when I cut his piece, the pie filling didn’t fall in.  It stayed put!

After so many things going wrong with these sweet potatoes, it’s nice to finally be able to check one off as a success, and for this I am — Simply Grateful.

Canned Sweet Potato Conundrum

Earlier this month I completed my first canning project of 2015 – sweet potatoes.  I was thrilled with the 21 quarts of sweet potatoes I put on the pantry shelf and could hardly wait to start using them.  This was the first time I had canned these and according to everything I’d read, home-canned sweet potatoes were excellent.

DSCF6647

Last week I cracked open the first jar, drained off the water, added a bit of salt and a tablespoon of brown sugar and popped them in the oven.  Thirty-five minutes later I pulled them out. The wonderfully sweet smell couldn’t be missed.  Anxious to see if they tasted as sweet as they smelled, I snuck a taste before putting them on the table.  Stabbing a potato with a fork, the potato broke right in half.  Very tender.  They smelled great, they were super tender, what more could I ask for?

Well, after eating the potato I had my answer:  Taste, oh and perhaps a bit of texture.  The sweet potatoes were tender that was for sure, tender to a fault.  They were water-logged.  And although the taste was there, that too was water-logged.  I was completely disappointed.

Why?  Why were my potatoes such a failure?  In all the articles I’d read on the internet, not one complained of their potatoes being tasteless or water-logged.  What had I done wrong?  More importantly though, what could I do to remedy this situation?  Or, if there was no remedy, what could I possibly use the remaining 20 quarts of potatoes for?

Feeling defeated, I decided to let the situation rest.  I was far too upset to attempt a solution.  At that point all I wanted to do was open every one of those remaining 20 quarts and pour them down the drain.

This happened a little over a week ago.  Since then I have gone in the pantry countless times and seen those 20 quarts sitting on the shelf mocking me.  The sick feeling in the pit of my stomach wasn’t quelling with time, so today I decided it was time to face the situation rather than hoping it’d somehow remedy itself.

The first issue I wanted to address was my desire to use these sweet potatoes for a side dish. Obviously using them straight out of the jar wasn’t going to work, so the only other option I could think of was to mash and bake them.  I opened another jar this afternoon, drained the liquid, mashed them, added some cayenne pepper and chili powder, and popped them in the oven.

The kitchen filled with the sweet smell of potato and 30 minutes later I opened the oven door to check on them.  Staring at the Corningware dish I knew immediately these were not going to be any better. Along the perimeter of the dish there was a distinct accumulation of liquid.  I tried pouring it off, only to lose a good portion of the potatoes in the sink.  They were runny.

Thinking that perhaps I could dry the potatoes out by cooking them longer and at a higher temperature, I increased the oven to 450 and let them cook another 30 minutes.  When I pulled them out of the oven the potatoes looked better, but when I served them, the runny potatoes flattened out on the plates.

Still, I wanted to believe that not all was lost.  I took a bite.  Gross!  These were even worse than the first batch I’d made.  They were tasteless, runny, and had absolutely no texture.

Hubby and Grace told me they didn’t think the first batch I’d made were that bad.  They just thought the texture was different but they could still eat them.  This second batch was not edible.

So what went wrong?  I raw packed them so it wasn’t that I over-cooked them prior to canning.  I used water, so perhaps a sugar syrup would not be absorbed as much.  What about the size I cut them?  The only guideline for cutting the sweet potatoes was to cut them so they fit in the jar.  I did cut them rather small, maybe if I cut them in bigger chunks they wouldn’t absorb as much water or syrup.

I hate this.  Here I thought I had all these wonderful jars of sweet potatoes for my family safely stored on the pantry shelf and it turns out I not only wasted all that money on the potatoes, but also my time and energy.  If I were a glass half-full type of person, I might consider this a good learning experience.  Today though I am a glass half-empty type and just want to cry.  I don’t accept failure well, especially when I don’t know why.

So what now?  Well, I spent the rest of the afternoon working on several recipes that called for sweet potato.  One was for sweet potato biscuits and the other for sweet potato bread.  Hubby is crazy for the biscuits and although the bread is okay, I’d definitely have to add some raisins and/or dried cranberries and possibly some frosting to improve on it.  Each of these recipes had to be tweaked because the sweet potato made the dough too wet, but the canned sweet potato did work.

Knowing these sweet potatoes can somehow be salvaged eases my disappointment, slightly.  I hadn’t canned them for this purpose, but at this point anything is better than nothing.  I have one more test I need to do with these potatoes before making up my mind if I will ever can sweet potatoes again — sweet potato pie.  This is one recipe I did plan on using the canned potatoes for. I am concerned about the water content in the potatoes, but am hopeful that with some tweaking and a little trial and error, it’ll work.

Life is certainly not perfect, but through the imperfections we learn and hopefully grow.  The trick to this is to not give up.  Lord knows I wanted to throw in the towel, but so far I keep banging my head against this brick wall, and for this I am — Simply Grateful.

Plum Goodness – Plum-Cranberry Sauce

Having our own plum tree can be both a blessing and a curse.  A blessing because over the past two years we harvested more than 400 pounds of fruit, a curse because over the past two years we harvested more than 400 pounds of fruit and more than 200 of it had to be canned or processed.  Last year we only had about 85 pounds of usable fruit to work with, but seeing as I still had plum pulp and juice in the freezer from 2013, I wasn’t about to complain.

Our whole family loves plum everything.  I make jam, jelly, preserves, juice, pie filling, can the whole fruit, and even dry them and make plum fruit leather.  Still, with so much fruit, the freezer quickly filled of containers of fruit and pulp that I had to save for another day. Today was that day.

Having a wonderful stockpile of cranberries in the freezer to keep me happy until next October when they once again will be sold locally, I decided to use some of them to make homemade cranberry sauce.  Not wanting to miss out on an opportunity to improve upon an old favorite, I decided that rather than use the “water” the recipe called for, I would use plum juice.  What a great way to utilize the abundance of plum juice in the freezer and make our cranberry sauce even better.

Plum-Cranberry Sauce/Spread

DSCF6827

  • 3 – 12 oz. Packages Cranberries, fresh or frozen
  • 3 Cups Plum Juice
  • 3 Cups Sugar
  • 7 Tbsp. Clear Jel mixed in 1/2 Cup Water

Rinse and sort cranberries.  Combine cranberries and plum juice in large stock pot and slowly bring to a boil.  Boil for 10 minutes covered, allowing the cranberries to pop.

DSCF4789

Remove from heat.  Using a stick blender, puree the cranberries until the mixture is smooth.  Pour liquid into a mesh strainer, removing the seeds and skins from the sauce.

DSCF4795

Return the strained sauce to the stock pot and add the sugar.  Stir over medium heat until sugar is dissolved.

DSCF4796

Slowly stir in Clear Jel slurry and increase heat to medium-high.  Bring to boil and boil hard for one minute.

Remove from heat and ladle into hot jars.  Process for 20 minutes in water-bath canner.

This recipe yields 5 – 12 oz. jars and 1 – 8 oz jar.

This particular recipe does not make a cranberry sauce that is jellied as those in the stores.  It is smooth and spreadable.  Not jellied enough for molding or slicing.

Plum Cranberry Sauce (1)

We especially like using this sauce on turkey burgers and pork, or even spreading on chicken like barbecue sauce.  It is sweet but still tart and the plum juice adds a subtle undertone of fruity flavor that makes this a great staple to have on hand for all sorts of meals.

An over abundance of plums might be a lot of work and at times may seem like a curse, but actually I am very grateful and love every minute of it.  From the first bud in spring, until the last plum is harvested, to the first taste of juicy fruit, and finally the last drop of juice frozen, I am Simply Grateful.

Cranberry-Meyer Lemon Marmalade

Last year I began experimenting with various citrus spreads.  For months I worked at combining flavors, sometimes using the rind, sometimes not, and learning a lot about how just the right amount of citrus can make jams and jellies really pop.

Several of the recipe that I wanted to try called for Meyer lemons.  I had no idea what these were.  I had never heard of them, let alone seen them.  From what I could gather, a Meyer lemon was supposed to be less tart, more on the sweet side.  Unfortunately, there was nothing that I could find that could be substituted here in Michigan.

Rather than not try the recipes that called for Meyer lemons, instead I decreased the amount of lemon in these recipes and substituted regular ones.  Also, I tasted the spreads often during the preparation to make sure there was enough sugar and that the spread was not turning too bitter.  Overall, I’d have to say that my marmalade and jams turned out pretty good.  Even so, learning about Meyer lemons intrigued me.

Last weekend while Hubby and I were out picking up a few things at the grocery store, I happened to walk past the produce department and on an end cap right up front they had a whole display of Meyer lemons.  I couldn’t believe it. How is it that they had them now?  Not willing to chance not being able to find them again, I picked up a couple of bags.

This morning I finally had a chance to work with these Meyer lemons and see what all the hype was about.  I slit the end off of one, cut a thin slice and popped it in my mouth.  My eyes scrunched up, the muscles in my face contracted, and I nearly choked.  This lemon was by no means sweet.  It was as tart as any lemon I’d tasted.

I wasn’t disappointed.  Maybe a bit surprised, but definitely not disappointed.  Not to be deterred, I pulled out a recipe that called for Meyer lemons and went to work.  Maybe there was something I didn’t know — maybe the lemons got sweeter as they cooked.  The recipe I chose was a Cranberry-Meyer Lemon Marmalade.  Not only would I be able to use up some of the Meyer lemons, but I’d also have a chance to use some of my stockpile of cranberries.

Cranberry-Meyer Lemon Marmalade

DSCF6823

  • 3 Meyer Lemons
  • 16 oz. (4 Cups) Fresh or Frozen Cranberries
  • 3 Cups Water
  • 3 3/4 Cups Sugar
  • 3 Tbsp. Clear Jel dissolved in 1/4 Cup Water

Peel lemons.  Remove the white pulp from the rind by scrapping with a pairing knife.

DSCF6821

Cut rind into thin slivers.

DSCF6822

In a large pot bring the 3 Cups water with the lemon peel to boil, simmer 15 minutes.  Much of the water will cook away.  It should decrease at least by half.

Juice the lemons. I put mine in a food processor and strained the pulp through a mesh strainer.  Add strained lemon juice, cranberries, and sugar to simmering lemon rind mixture and return to boil.  Simmer 15 minutes.

DSCF6824

Stir in Clear Jel slurry and slowly return to boil. I turned the stove down to medium for about 5 minutes and then began to increase the temperature to high.  It took about 10 minutes for the mixture to return to boil and reach the thickness I wanted.

Remove from heat and ladle into hot jars.  Process 8 oz. jars for 15 minutes in water-bath canner.

DSCF6826

This recipe yielded 5 – 8 oz. jars and 2 – 4 oz. jars.

The original recipe I found online called for 7 cups of sugar and Certo pectin.  I began taste-testing the marmalade when the cranberries had popped but before adding the Clear Jel. I knew there was no way I wanted to add 7 cups of sugar to this, so I started with 3 cups and added the additional 3/4 cup before the second 15 minute simmer was done.

This marmalade is wonderful.  It has a subtle lemon flavor and the rind slivers are tender and not as bitter as regular lemons. Perhaps this is the difference everyone is talking about.  Of course this is the first time I’ve combine cranberries with lemons, so the cranberries might cut down on the bitterness of the rind as well.  Regardless, this marmalade is a keeper, and for this I am — Simply Grateful.

Crackling Biscuits – Using Lard Byproducts

One of the goals I have set for myself is to not throw anything out that might possibly have a use, and yet not keep things around that are unnecessary.  This might sound contradictory and in some ways it is, but when it comes to food, it serves me very well.

Not wanting to waste any part of the foods we buy or grow, I have been able to come up with new recipes and uses for many things that would have otherwise been thrown out.  It gives me a great sense of comfort knowing that I am making the most of what we have.

The other day, while I was making lard, I knew that once all the lard had been melted out of the pork fat there would be crispy pork fat left over.  For years I have been making cracklings from pork that has a fairly high fat content but still enough meat to make them tasty and enjoyed the lard by-product I was left with once the cracklings were done. When faced, however, with a pork fat byproduct after rendering lard I wasn’t sure what could be done with it.  This by-product was practically all fat.  What could I possibly do with crispy fat?

DSCF6816

Marrying someone with a different ethnic background than myself has opened many doors when it comes to culinary experiences.  I am basically a mutt of ethnic lines — English/Irish, German, Russian-Polish, French, and there is even a rumor there could be some American Indian in the mix.  Hubby, however, is Serbian through and through, born there and not coming here until he was a young boy.  Albeit he is American at heart and to see or talk to him you’d never know he wasn’t born here, he still enjoys many of the customs and tastes of his homeland.

When Hubby learned that I was struggling to find a use for the crispy pork fat leftover from the lard rendering, he immediately suggested I make some crackling biscuits.  He told me that his mother made these whenever she made cracklings and had some that were all or practically all fat.  Intrigued I told him I’d give it a try.

Not sure exactly what an Internet search would produce, I spent over an hour going through page after page of recipes for crackling biscuits. It’s amazing how many are out there.  Some of the recipes were from Hungary, Czechoslovakia, Croatia, and yes, Serbia.  I printed off five recipes that were all very similar, from different areas, and spent time comparing them.  Finally, after discussing the ingredients with Hubby, I decided to combine several of the recipes into one quick and easy one.  Starting off easy and then working my way up to something more difficult, if need be, seemed like the thing to do.

It was interesting that Hubby didn’t want me to go with the Serbian recipe I had found.  When I told him that the Serbian one included wine though he laughed.  He told me that there was no way his mother would have had wine to put in the biscuits when she learned how to do it.  They didn’t have anything, let alone wine for cooking.  Flour, salt, and cracklings were hard enough to scrape together.

The biscuits came together very quickly and seeing as Hubby didn’t want me to use yeast, as it would have made them light and fluffy, something you’d never accuse his mother’s biscuits of being, they were in the oven in less than 30 minutes.  I set the timer for 25 minutes and we waited.  The moment they came out of the oven, Hubby was standing at the counter.  He took one off the tray, burned his fingers, but still continued to break it in half.  His first comment was that it wasn’t cooked inside.  I told him that he needed to let them cool on the cookie sheet. Reluctantly he put it back.  A minute later he picked it up again and popped half of the biscuit into his mouth.  You see, patience isn’t one of Hubby’s virtues.

I watched as he swished the biscuit from one side of his mouth to the other, prolonging my torture.  Finally, after just a moment longer he smiled and said, “Perfect.”  He proceeded to eat four more biscuits and with each one told me something else he liked about it:  The texture, the amount of cracklings, the heaviness, the taste.  Then, as he was eating his sixth he confessed that he never liked his mother’s biscuits warm.  He always waited until they were cold and then would eat them sparingly.  Not so with mine.  By the time they were cool, nearly half the biscuits were gone. That spoke volumes.

Crackling Biscuits

DSCF6815

  • 2 1/2 Cups Flour
  • 1 Tbsp. Salt
  • 1/2 Cup. Milk
  • 1 1/2 Cup Pork Fat Cracklings (shredded)
  • 1 Egg
  • 2 Tbsp. Pork Fat Lard

Combine the flour, salt, and shredded cracklings in a large bowl with a pastry blender until crumbly.  Make a well in the center of the crackling mixture and add remaining ingredients.  Stir until well combined.  Knead lightly with hands until mixture forms a dough.

Turn dough out onto lightly floured surface and pat to 1/2″ to 1″ thickness.  With biscuit cutter, cut biscuits and place on parchment lined cookie sheet.

Bake biscuits at 400 for 25 minutes.  Cool completely on cookie sheet.  Store in sealed container.

Nothing is better than pleasing Hubby’s pallet, except of course topping one of my mother-in-law’s recipes, and for this I am — Simply Grateful.

Rendering Three Types of Lard

For the past several years I have been using peanut oil for deep frying and in place of vegetable or canola oil whenever called for.  Other than coconut and olive oil, peanut is supposedly the next best option.

Recently I finished the last of the 4 gallon container I’d bought and went in search of a new one.  To my dismay, the store I usually bought this at had discontinued carrying it.  So, off to the internet I went.  In searching for bulk peanut oil, I began to get somewhat discouraged, as I did not want to pay shipping.  The only other option I had was to buy smaller containers at the grocery store, at nearly twice the amount of money per ounce.  Suddenly, I decided that peanut oil was not going to work.

In researching other options I realized that I used probably the best possible type of oil product in some of my baking and frying already, but had never considered using it exclusively — lard.  I save the fat every time I make bacon and strain off the fat (lard) when I make cracklings.  Why it hadn’t occured to me to use lard more often, escapes me.  Although I might not have had  enough “clean” home-collected lard to do everything I wanted, I knew for certain that lard could be purchased at any grocery store.

Remembering that I’d seen those green and white boxes of Armour lard in the meat department at our local grocery store, I headed over there.  Not finding what I needed, I asked the butcher.  She told me that they no longer carried the lard I remembered, but had another brand.  She directed me to the International Aisle.  Confused I asked her how “lard” could be stored on the shelf without refrigeration.  She told me “lard” did not need to be refrigerated.

Ok then!  I knew immediately that this woman knew absolutely nothing about lard.  If the lard she was directing me to was “real” lard, it would most definitely have to be refrigerated.  I left her and went to the International Aisle, located the lard she referred me to, and proceeded to read the ingredients.  Just as I thought — Hydrogenated.  If I wanted artificial, I’d be using vegetable oil.  Back to the drawing board.

For the next several days I went to four different grocery and international stores and found all of them had exactly the same brand of lard as well as the familiar green and white box of Armour lard, which it turns out was also hydrogenated.  Frustrated, I finally went up to the meat counter of the last market I went to and talked to the butcher.  I told him I wanted “real” lard and seeing as it didn’t appear I was going to find it, wondered if it would be possible to get some pork fat and render my own.  He was very supportive and told me that he would save the pork fat for the next week for me and I could pick it up on the weekend.

I was excited!  As nice as it might have been to be able to just run up to the store and buy lard right off the shelf, making my own lard was even better.  I would know exactly what was in it, when it was made, and have yet another use for all my canning jars.  Could this get any better?

A few days ago I went to pick up my pork fat.  I hadn’t asked how much the fat was going to cost, but figurered pork typically costs less than $4.00 a pound, so anything less than that would be fine.  The butcher handed me a 10 pound bag of pork fat — no charge.  I guess seeing as he was just going to throw it out, he didn’t think it necessary to charge me.  Score!

The next step was to start rendering lard.  Lard is easy enough to render, but what some people don’t know, is that there are various types of lard that are produced from pork fat depending on what temperature you use to extract the lard.  I have never rendered lard that does not have some hint of pork flavor, but the temperature the fat is melted at determines how much flavor the lard will have.  The higher the temperature, the more flavor; the lower the temperature, the less.

Wanting to render several different types of lard I decided to begin the rendering at 200 degrees and work my way up to 400.  First, I melted the lard slowly for 8 hours at 200 degrees.  After draining off the lard I returned the fat to the oven and increased the temperature to 300 for an additional three hours.  Finally I strained off the liquid lard and returned the fat to the oven and increased the temperature to 400 and let it cook for several more hours until the fat was completely crisp and light brown.  The smoke point for lard is 370 so increasing the temperature to 400 gives this final bit of lard a smoky pork flavor, very tasty in breads.

DSCF6819

The above picture does not do the varying colors of the lard justice.  Starting from the left is the whitest of the lard, which was rendered at 200 degrees.  The middle quart is beige and was rendered at 300 degrees.  The final pint is the darkest and was rendered at 400 degrees.

For two days I worked on the lard and in the end I had one quart of lard with just a hint of pork flavor, one quart with medium pork flavor, and a pint of lard with heavy pork flavor and it’s all real.   Success!  Now I have lard for baking, lard for frying, and a pint of very special lard for some very special recipes, and for this I am — Simply Grateful.

Canning Pear-Cranberry Pie Filling

DSCF6734

When I was a kid I hated pears. The texture, the taste, even the look of a pear was something I absolutely hated.  Not until I was an adult did I finally discover the joy of pears and all the possibilities.

The turning point for me came one warm summer afternoon when Hubby and I were enjoying a barbecue at a friend’s house.  After the grill was through spouting smoke, our hostess brought out dessert.  The moment we saw it, Hubby exclaimed, “Oh good, apple pie my favorite!”  You see, Hubby loves pie and especially apple pie.

With a coy smile however, our hostess replied, “Not quite.”

We were intrigued.  It sure looked like apple pie.  The beautiful brown sugar topping with the perfect slices of apple peeking through — what else could it be.

Well, when I took my first bite, I immediately knew what it was — pear. Very smooth and mild with just a hint of spice.  A nice change from the traditional apple pie.

Although I love pear pie on its own, I really like it with a little zip in it and that’s where cranberries come in and thus this wonderful new pie filling for the pantry shelves.

Pear-Cranberry Pie Filling

DSCF6738

  • 11 lbs. Pears (mixed varieties)
  • 3-12 oz. Bags Cranberries
  • 4 Cups Sugar
  • 2 Cups Clear Jel
  • 3 Cups Water
  • 6 Cups Apple or Pear Juice
  • 12 Tbsp. Lemon Juice
  • 1 tsp. Nutmeg

Wash, peel, and core pears.  Slice pears 1/4 – 1/2 inch wide and soak in water containing lemon juice to prevent browning.

Boil water and blanch pears and cranberries for 1 minute after the water returns to a boil.  Drain but keep warm fruit in a covered bowl.

Combine Clear Jel in water and mix until smooth.  Add the Clear Jel slurry, sugar, spice, and apple or pear juice in a large stock pot.  Stir and cook on medium high heat until mixture thickens and begins to bubble.  Add lemon juice and boil 1 minute, stirring constantly.  Remove from heat.

Fold in drained pears and cranberries and fill hot jars with mixture, leaving a 1-inch head space.  Remove air bubbles.  Wipe rims, adjust lids, and process immediately for 25 minutes at a full boil.

This recipe made 7 quarts of filling plus a pie to enjoy right away.

As with my apple pie filling, I use a variety of pears with varying textures and sweetness to really make this filling pop.  This pie filling is absolutely wonderful on its own, but to switch it up I might add a jar of apple pie filling on occasion.  This gives me even more dessert possibilities, and for this I am — Simply Grateful.

Homemade White Cheddar Thumbprint Crackers/Cookies

Last summer the two jalapeno pepper plants I planted yielded more than 300 peppers.  After canning more jars than I would need in a single year, using some in daily meals, gifting some to the neighbors and family, and freezing some just in case I found another use for them, I still had more peppers than I knew what to do with.  As usual, this brought me to the internet to search for uses for these wonderfully hot peppers.

Jalepeno Peppers

Jalapeno Peppers

One recipe I found was for Jalapeno Jelly.  Thrilled with this new recipe, I made a full batch and put it on the pantry shelf, hoping to find a use for it sometime in the future.  To be honest, I was sort of afraid to even try it.  I like hot things, but jalapeno’s are so very hot, that even testing this jelly was not something I could bring myself to do.

Last week, after I made my Cranberry-Tangerine Spread, I bought some water crackers to eat it on.  Remembering seeing an advertisement where someone used jalapeno jelly over cream cheese and served it with water crackers, I decided to finally test the jelly.  I fixed two crackers.  First I spread a thin layer of cream cheese on each cracker and then a thin layer of jalapeno jelly.  Not wanting to go through this experiment alone, I took the crackers to Hubby and we ate them together.  What a surprise!  I was expecting the jelly to be hot — not sweet. It was both hot and sweet which was a total shock.  Why, I’m not really sure as the recipe called for lots of sugar, but I guess I never thought beyond the hotness.

Hubby absolutely loved it and proceeded to follow me back out to the kitchen and make himself a plate full of crackers.  Totally thrilled, my mind began to race with the possibilities.  I remembered printing off a recipe for a thumbprint cookie that called for hot pepper jelly as the center.  Perfect.  Not only would I have another use for all the jalapeno jelly, but hopefully have a new appetizer worthy of serving to guests.

The recipe I printed off used several ingredients that Hubby doesn’t like — nuts for one.  He isn’t fond of having nuts in any cookie or dip I make.  So, I tweaked the recipe a bit and came up with the following:

White Cheddar Thumbprint Cookies

DSCF6729

  • 1 1/2 Cups Shredded Sharp White Cheddar Cheese (I used Cracker Barrel)
  • 1/2 Cup Freshly Grated Parmesan Cheese
  • 1/2 Cup Butter Softened
  • 1 Egg Yolk
  • 1/4 tsp. Pepper
  • 1 Cup Flour

Toppings (optional):

  • Hot Pepper Jelly
  • Cream Cheese
  1. In a food processor, pulse together cheeses and butter until smooth.
  2. Add egg yolk and pepper.  Pulse until blended.
  3. Add flour to food processor and pulse until dough forms.
  4. Roll dough into 1 inch balls and place on ungreased cookie sheet.
  5. At this point you can make an indentation in the center of each ball with your thumb if you wish or use a meat tenderizer as I did to press the cookies flat.
  6. Place cookie tray in fridge for 15 minutes.
  7. Bake at 350 for 15 minutes, until lightly golden.  Cool on baking sheet.
  8. If you want to top, place a small amount of hot pepper jelly in the center of each cookie or a small amount of cream cheese and top with hot pepper jelly.

Hubby loved these cookies with and without the jalapeno jelly.  I made the first tray of cookies with thumb indentations and the second pressed flat.

This recipe can be tweaked in many ways.  I can’t wait to try them using different cheeses and possibly some cayenne pepper.  The white cheddar made the flavor of these cookies very similar to that of a Cheez-It, but the texture was far superior and the flavor more pronounced. A definite keeper for my recipe box.

I’m not as open-minded as I’d like to be when it comes to trying new foods, but I’m getting better.  Having Hubby around as a willing guinea pig is a big help in this department, and for this I am — Simply Grateful.


Triple Berry (Cranberry/Raspberry/Blackberry) Spread

My kitchen appliance/gadget wish list is long and full of tons of things that I need, want, and can only dream of ever having. On this list, at the very top, is an upright freezer to store all the canning jars I want to fill with pies, cheesecakes, meals, and quick-fix snacks.  Along with these, I would store all the fruits and vegetables I freeze every year for use during the long Michigan winters.

Right now I have a chest freezer and refrigerator with a freezer in the basement as well as the freezer in the refrigerator in the kitchen.  These freezers are constantly full and I am continually needing to reorganize everything inside of these in order to store anything new.  It is truly a source of stress that I don’t enjoy dealing with on a daily basis.

Much of the fruit that is stored in the basement freezers are there to be used in canning projects that I have not gotten to either because of lack of time or lack of ingredients.  With the stock of cranberries I picked up in October and November of 2014, I am now able to possibly make a dent in some of that fruit and clear out some space.  As much as I’d rather just go out and get that upright freezer that I’ve been wanting for so long, it’s still not in the cards.

Hubby and I are at opposite ends of the spectrum on whether or not this is a necessary expense or not.  I suppose I can survive without another freezer, and it is a “want”, but no matter if I were to use up all the fruit that is waiting to be canned, the fight for freezer space would continue.  It’s one of those unwritten laws I think.  No matter how much space I have, it is never enough.  So why do I think another freezer would solve all my problems?  Well it wouldn’t, but boy it would sure be fun filling that new freezer.

Anyway, seeing as chicken thighs are on sale this week and I want to stock up a bit while the price is good, I pulled out several bags of cranberries, raspberries and blackberries, to try a combination recipe that I thought would be fun.

Triple-Berry Spread

DSCF6727

  • 3 Cups Cranberries (12 oz bag)
  • 3 Clementines
  • 3 Cups Red Raspberries
  • 3 Cups Blackberries
  • 3 Cups Sugar
  • 3 Tbsp. Clear Jel mixed in 1/4 Cup Water

Peel and section the clementines.  Combine the clementines with cranberries in a food processor and process until coarsely chopped.

Put processed cranberry mixture in a large stock pot and add remaining berries and sugar.  Bring this to a boil over medium-high heat and simmer for 10 minutes.

Remove from heat and puree using a stick blender.  Strain the puree through a fine mesh strainer to remove cranberry skins and berry seeds.

Return strained puree to stock pot and add Clear Jel slurry.  Bring mixture to full rolling boil and time one minute. This thickens very quickly so be careful, it spatters terribly.

Remove from heat and immediately ladle into hot, sterilized 8 oz. jars.  Top with hot lids and process in water bath canner for 10 minutes.

This recipe will yield 7-8 oz. jars.

Making a dent in the overflowing freezers in the basement is great, but having this new spread to add to my ever-growing list of tasty spreads is even better.  One more cranberry project under my belt, and for this I am — Simply Grateful.


Cranberry-Targerine Spread

This weeks canning adventures have been far less productive than last, but alas, life happens.  I was able to fit in my first of what will no doubt be many cranberry canning projects and learned a few things along the way.

I found this recipe in a book that I received for Christmas.  After making a few tweaks, I think the results were excellent, and Hubby agrees.

Cranberry-Tangerine Spread

DSCF6723

  • 12-oz. Package of Cranberries
  • 1 Cup Water
  • 1/2 Cup Tangerine or Orange Juice
  • 3 Cups Sugar
  • 2 inches Cinnamon Stick
  • 1/4 Cup Additional Tangerine or Orange Juice
  • 3 Tbsp. Clear Jel

In a heavy saucepan, combine cranberries, water and 1/2 cup of juice.  Bring this to a boil, reduce heat, and simmer covered for 5 minutes until cranberries pop.

DSCF6719

Using a stick blender, puree the cranberry mixture in the pan.  Add the sugar and cinnamon stick and return to boil, stirring constantly.  Reduce heat and simmer for 20 minutes or until slightly thickened.

DSCF6721

Remove from heat and strain out cranberry seeds and pulp.  Return strained spread to pan.  Combine the remaining 1/4 cup juice with Clear Jel and stir till smooth.  Add Clear Jel slurry to pan and bring mixture to boil.  Boil hard for one minute, remove from heat.

Ladle hot spread into hot, sterilized 8-ounce jars, leaving 1/4-inch head space.  Apply lids and process in water bath canner for 10 minutes.  This recipe made 4 – 8-ounce jars.

I let this spread set overnight and opened one of the jars the next morning for breakfast.  The spread was smooth and mild.  There was a slight hint of cinnamon but no hint of citrus.  That’s when I realized that the purpose of the tangerine/orange juice was not to add flavor to this spread, but rather to smooth out the taste.  Cranberries can be rather tangy, to put it mildly.  They have a bite that can almost burn when used by themselves.

DSCF6722

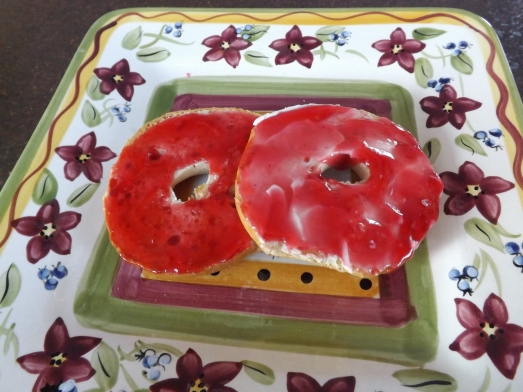
I used the spread on a bagel, one side with cream cheese, the other without.  Both were delicious, but I preferred the one without the cream cheese because I could taste more of the spread on that side. It was equally delicious on water crackers with cream cheese later in the day for a snack.

Besides enjoying the fruits (no pun intended) of my labor and eating all the canned goods I make, learning something new when I’m going through the process is always an added bonus.  I have several recipes using cranberries to try in the next few days and should I find that the flavor has too much of a bite to it, I now know how to tame it down, and for this I am — Simply Grateful.