Attack Of The Killer Slugs!

Yesterday, as hubby and I were moving the yard of dirt I’d had delivered for the new section of garden, I noticed that my freshly topped pepper plants had holes all over the leaves. Great! I thought, Just what I need. As if I know anything about gardening other than plant, water, pick.  There are so many things that can go wrong with a garden, so much I don’t know, so many threats — and gardening season has barely begun.

In years past, had anything like this happened, I would have ignored it, leaving it to the will of the gardening gods. This year, however, I am determined. I am hell-bent on this garden surviving, flourishing, and eventually producing. For once in my lifetime I want to be able to say “I can garden!”

Walking back and forth, wheelbarrow-full and after wheelbarrow-full, I contemplated what to do.

  • I could go up to the gardening store and ask someone there, hoping that they hadn’t just been hired as a seasonal worker, trying to make extra money before heading back to school.
  • I could check with my neighbor whose garden has always been quite fertile and successful, although since I began planting and expanding, he has been a bit competitive with me. It’s almost as if he were taking it personally that I wanted to finally have as successful a garden as he.
  • I could wait and see if perhaps the leaves were eaten by some insect, but deciding that they were not what they really wanted, had moved on.

None of these solutions placated me. I wanted a solution that was somewhat dependable, could be found without leaving the house, was economical, and would solve the problem immediately. Now, is that too much to ask? I didn’t think so.

So, off to the Internet I went. Typing in: My pepper plants have holes in their leaves — I was met with page after page of promised solutions. The first one I went to told me the problem, or supposed problem. It told me that based on the fact that I keep mulch around the plants, the culprit was more than likely a slug. I suppose this is to be expected. For every one thing I do to try to minimize the amount of work I have in the garden, there will no doubt be a new problem to deal with. I put in the mulch to keep the weeds to a minimum, now I had slugs to contend with.

Reading on various other sites, the slug suggestion was confirmed again and again. Slugs it was. Now the problem was how to get rid of them, again I wanted something dependable, something I could find without leaving the house, was economical, and would solve the problem before my plants were eaten to mere sticks.

Typing in: How to get rid of slugs — brought up ads for slug traps I could buy but that was not what I wanted, remember: economical and immediate. Further down the page I found a link that took me to a You Tube video advertising a homemade slug trap that was sure to work. When I clicked on that, I found a whole page of videos with slug trap ideas. Thank God for the Internet!

I watched three or four videos and found that they were all pretty much the same. Research was over, it was time for action. I gathered the supplies I would need and got to work.

Supplies:

  • Small plastic pop or water bottle
  • Twist ties
  • Scissors
  • Beer (yep, beer!) and not for me, for the slugs!

First I cut the bottom 3 inches off the plastic bottle. Then I cut the top 2 inches off the top. Placing the top in the bottom upside down, I punched two holes in the sides, through both the top and bottom portions. Using the twist ties, I secured the top section to the bottom section.

I made three traps, although I have four pepper plants. I don’t have a lot of bottles at the moment so I figured if it didn’t work, I didn’t want to have to throw four bottles out. Anyway, one of the plants had only a couple of holes on the leaves, so I’d try to save the other three first.

With traps in hand, I took the can of beer hubby reluctantly sacrificed in the name of peppers, my gardening gloves, and a hand trowel to the side of the house where the pepper plants basked in the sun. Digging a small hole among the mulch, very close to the pepper plant stem, I buried the trap even with the mulch and then poured in enough beer to make a small pool in the bottom of the trap.

A close-up of the slug trap.

A close-up of the slug trap.


You can see where something has been eating my pepper leaves.

You can see where something has been eating my pepper leaves.

That’s it! It took all of 20 minutes to gather the supplies, make the traps, and set them. The hardest part was going to be waiting until morning to see if they worked. Apparently the slugs like it dark, so the chances of them coming out while the sun was blasting for a little beer were not high.

This morning, without waiting for my morning coffee to finish brewing, I slipped on some shoes, pulled a robe around my pajamas, and headed out to the side of the house. Starting at the closest plant, I looked in the trap. Yep, nothing — unless of course you want to count the dead ants floating in the beer. On to the next plant. This one was even less promising, it didn’t even have a dead ant in it. Okay, so I wasted 20 minutes and lost $0.30 on the deposits of the bottles I used, I could chalk this up to experience. Disheartened I moved on to the third plant. Removing the trap, I noticed something big sloshing in the beer. Peering through the top into the bottom, like looking through the eyepiece of a telescope, there floating in the beer was a big, fat slug!

See him floating down there.

See him floating down there.

You're not going to be bothering any more pepper plants you old slug!

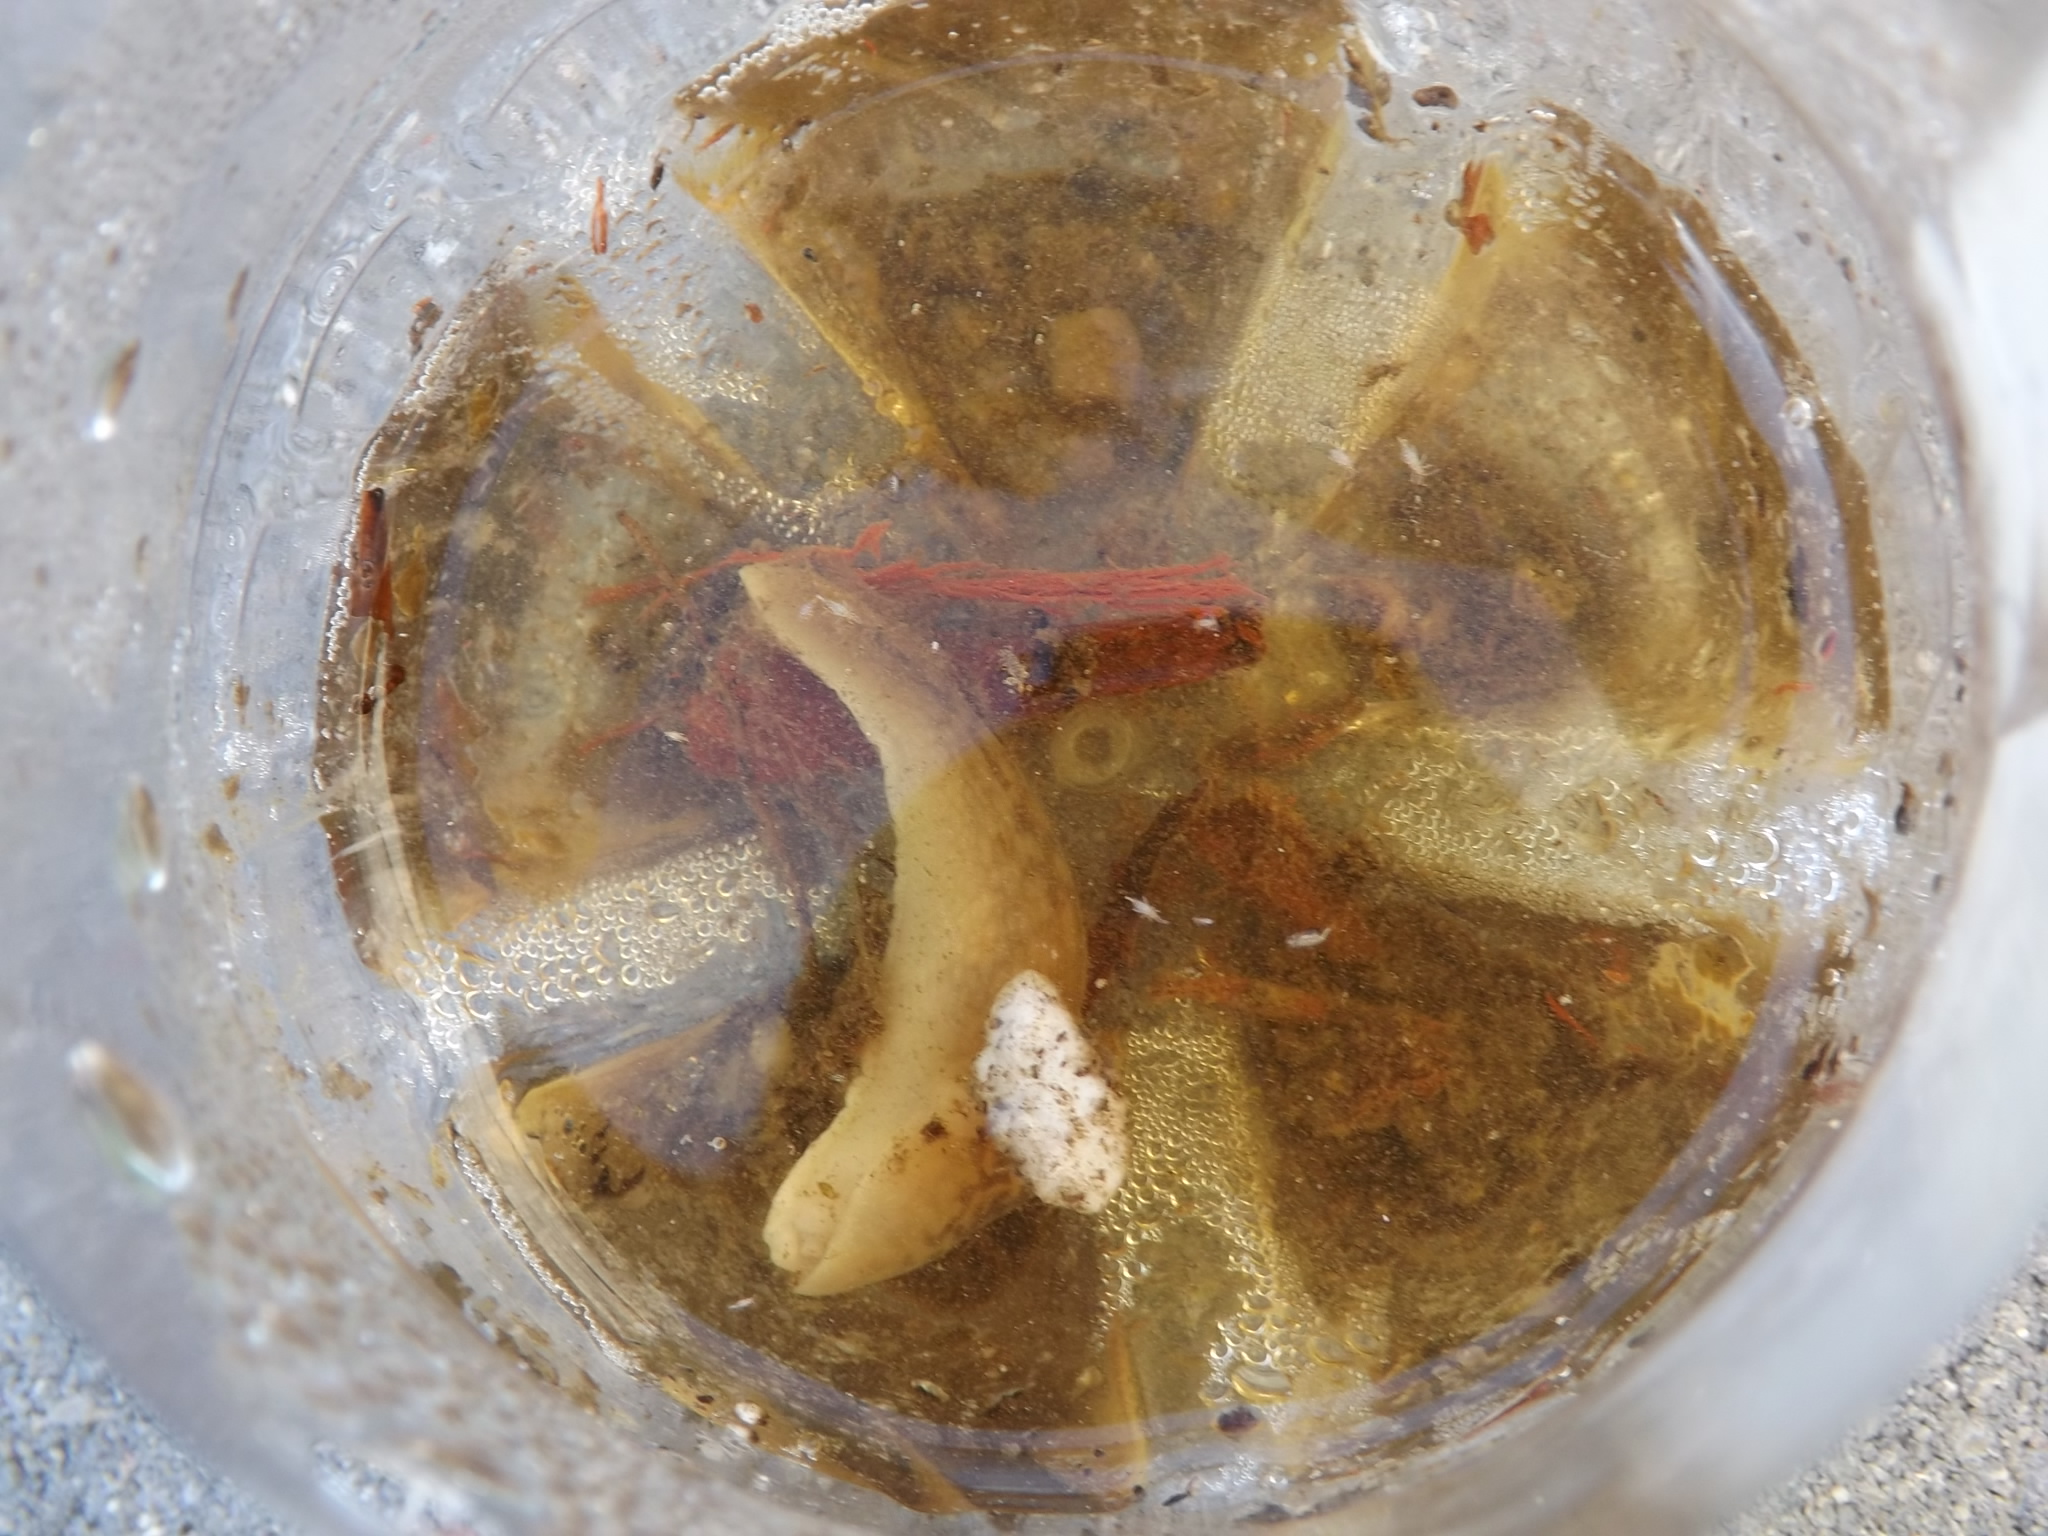
You’re not going to be bothering any more pepper plants you old slug!

Success! The rush was unbelievable. I’d done it. Not without lots of guidance from the Internet, but I actually solved this problem without spending a lot of money, without leaving the house, and before my pepper plants were eaten away to nothing.

I have to admit I felt a little bad for the slug. When I thought about it more though I realized he had a good death, he died drunk and no doubt happy, and for this I am — Simply Grateful — okay, that just sounds wrong, but I am sure glad it worked! (I hope I don’t get letters from the Bug Rights Activists about this.)

When Life Gives You Lemons…Make Marmalade

Yesterday was all about grounding myself, recouping, and getting back to basics. Turkey soup took care of the recouping, laundry took care of getting back to basics, and the one thing that always helps keep me grounded is canning.

There are so many recipes I want to try, have thought of trying, might want to try, might try if I ever have the time, and some I might never try because the ingredients just don’t appeal to me. I’ve made jams, jellies, preserves, spreads, sauces, syrups, butters, conserves, and pickles and for the most part have liked 95% of those I’ve made.

The one thing I had not made, however, was marmalade. The thought of eating the rind of a lemon, lime, or orange was not something that sounded good to me. Then I opened my mind and tried a recipe that called for lime zest – Kiwi-Lime Jam. The results were so good that I had to scour my recipe books and find other recipes that called for citrus zest.

After looking through my cookbooks and going through several searches on the Internet, I decided on a recipe that I had all the ingredients on hand and was fairly simple — Lemon-Kiwi Marmalade. Although this recipe called for using the entire lemon, not just the zest, I figured I’d never know if it was any good, if I didn’t give it a try.

The recipe I found called for Meyer lemons. I have no idea what these are and did not take the time to research it, but did find out they are apparently sweet. Meyer lemons are not something I have ever seen here in Michigan, so I decided to substitute half the amount of regular lemons along with a sweet orange. I also decided to add more kiwi to the recipe — those lingering doubts about large amounts of citrus peel prevailed.

The results? Well, I decided to toast a slice of English muffin bread and cover one half with the Lemon-Kiwi Marmalade and the other half with Kiwi-Lime Jam.

DSCF1731

Lemon-Kiwi Marmalade on the left; Kiwi-Lime Jam on the right.

I decided to start with the lemon-kiwi, thinking if I didn’t like it, I would at least be able to finish off with something I knew I liked. The first bite was bitter. Not unbearably bitter, but more bitter than the kiwi-lime. The second bite I savored a little longer in my mouth, taking in the subtle orange flavor and the mild kiwi. Already I was getting used to the bitterness of the lemon. The third bite…well let’s just say I wished I’d covered the entire slice of bread with the lemon-kiwi. Although I enjoyed eating the kiwi-lime half, I would have loved to savor more of the lemon-kiwi marmalade.

This morning my breakfast will consist of a slice of English muffin bread completely covered with the lemon-kiwi marmalade. It’s definitely one of my new favorites. Here is how I made it.

Lemon-Kiwi Marmalade

2 Lemons with ends cut off and seeds removed
1 Sweet Orange with ends cut off and seeds removed
10 Ripe Kiwi peeled and thinly sliced
3 Cups of Sugar

The night before making the marmalade, prepare the lemons and orange by cutting off the ends and removing the seeds. Quarter lemon and put in food processor with one cup of sugar. Put the entire lemon in, peel, membranes, pith and all. Process till very fine. Quarter the orange and put in the food processor with one cup of sugar. Process till very fine. Combine the processed lemon and orange in a glass bowl. Cover and let sit overnight.

The next day, peel and slice the kiwi. Place kiwi in a bowl and combine with one cup of sugar. Let sit for one hour or more.

Combine lemon and orange mixture with kiwi mixture in large stock pot.

Combine lemon-orange mixture with kiwi.

Combine lemon-orange mixture with kiwi.

Bring to full rolling boil, watching closely that it doesn’t scorch. Reduce heat to medium-high and stir constantly until mixture thickens. This took about 30 minutes.

While mixtures cooks, prepare jars and lids. When the marmalade is the consistency you like, remove from heat and fill jars, leaving a 1/4“ head space.

DSCF1726


Cover jars with hot lids and bands and process in water bath canner for 15 minutes.

Lemon-Kiwi Marmalade

Lemon-Kiwi Marmalade

This recipe yielded 3 – 8 oz. jars and 4 – 4 oz. jars.

I have always been afraid to try recipes that are beyond my comfort zone. Having never eaten marmalade, I had no idea what to expect. My preconception of a bitter, sour, inedible spread was unfounded. I am so glad I stepped outside my comfort zone and tried this recipe.

From now on my new motto is going to be: When life gives you lemons…make marmalade, and for this I am — Simply Grateful.

Turkey Carcass Soup – Thanksgiving All Wrapped Into One Pot

My body feels like it’s been run over by a truck. Okay, so I don’t actually know what it feels like to be run over by a truck, but I imagine it’s got to hurt — an awful lot, and my body right now, hurts, a lot. Lifting my arms to put on a shirt took more effort than I’d like to admit and bending over to pet Bell made me howl.

Why? Well, I guess the gardening, sod removal, weeding, planting, and bush removing that I’ve done the past three days, finally caught up with me. I’m just not that young anymore and am aging faster than I can keep up with. At the rate I’m going, by weeks end I’ll be older than I was just a few days ago, which goes without saying.

In order to recoup, revitalize, and renew my perspective, today was a day to ground myself and the best way I know how to do this is to hang laundry on the clothesline, fill a vase with the last of the lilacs from the bushes on the side of the house, throw a pot of soup on the stove, and can something. Nothing helps me “reset” after a busy couple of days than getting back to basics.

Laundry is never a problem around here, there’s always something to wash. Clipping the lilacs only took a minute or two, and filled the house with their sweet smell one last time until next year. The soup? Well, while most people were probably grilling on Memorial Day, I went against the grain and made roast turkey.

Yep! Thanksgiving in May with all the fixings. Turkey, homemade stuffing, mashed potatoes and gravy, homemade cranberry-plum sauce, pickled beets, and sweet potatoes. No pumpkin pie this time, but we did have fresh fruit for dessert.

The best part of making turkey any day of the year is what type of “Leftover Makeover” can be done with the turkey — Turkey Carcass Soup. Had it not been 85° on Memorial Day and the kitchen not been 95° because the oven had been going for five hours along with all four burners on the stove, I would have done exactly what I do Thanksgiving night, thrown the turkey carcass in the pot right after dinner. Not being thrilled with the prospect of sweltering in the heat the rest of the night, I chose to refrigerate the carcass until the weather broke a bit.

This morning, the weather was perfect for putting a large stock pot on the stove and allowing it to simmer all day on low, filling the house with the mouth-watering smell of roasted turkey and herb stuffing all over again.

Growing up, my mother never made Turkey Soup. I’m not sure why, she just never did. She was a good cook, albeit her comfort zone never wavered beyond meatloaf, roasts, and spaghetti. Although certainly not a gourmet meal, turkey soup was just not on her menu repertoire.

After many years of enjoying homemade chicken soup, one Thanksgiving night, as I was striping the turkey carcass of it’s meat for storage, preparing the bones for the trash, it hit me — Why not throw the carcass, scraps, fat, bones, and skin in a pot of water and see what happens? The results were better than I imagined. Unlike chicken soup, which I make with chicken thighs with the skin bought specifically for making soup, the turkey carcass had remnants of stuffing and roasted skin which gave the soup a rich, deep flavor. The broth was so good, I decided it would be a shame to muddy it with anything more than some fresh, needle-thin egg noodles, so I strained everything else out. Although not substantial enough for a meal, especially without any vegetables or meat, the flavors of the roasted turkey, herb stuffing, and vegetables added to the broth made for an amazing first course to any dinner or a great accompaniment for cold or hot turkey sandwiches for lunch.

Today’s “Leftover Makeover” is Turkey Carcass Soup — I know the name is a bit risky, but I bet it’s one you’ll remember.

Turkey Carcass Soup

Carcass from Roasted Turkey, including any fat, skin, bones or scraps that you can scrape off the cutting board
Large Stock Pot filled with hot water
2 tsp. salt
4 Carrots peeled and chopped in food processor
1 Large Onion peeled and chopped in food processor
3 Stalks Celery chopped in food processor

Put turkey carcass and cutting board scrapings into large stock pot and cover with water.
Add salt.
Prepare vegetables.
Add vegetables to pot.

DSCF1729Bring soup to boil over high heat. Reduce heat to medium and simmer for 3-4 hours or until all meat falls from bones and carcass falls apart.

After only an hour the broth is already getting murky from the fat.

After only an hour the broth is already getting murky from the fat.

Remove from heat and strain vegetables, bones, and meat from broth.
Return broth to pot and bring to boil.
Add thin egg noodles and return to boil. Noodles should cook within 2 – 3 minutes.

DSCF1767Serve.

DSCF1770If you want vegetables and/or meat in your soup, once the soup has been strained, you can add diced turkey and vegetables to the broth, cook an additional hour or more depending on how thick vegetables are cut, then serve.

Taking a break from the seasonal demands of summer might not have been on my to do list but sometimes the body knows what the head won’t admit. Today my body told me it needed a day that didn’t include hauling dirt, digging holes, pulling weeds, trimming grass, pruning plants, or planning my next big garden project. This gave me the time needed to ground myself and get back to basics, and for this I am — Simply Grateful.

Garden Fever – Dreaming Big!

I grow plants for many reasons: to please my eye or to please my soul, to challenge the elements or to challenge my patience, for novelty or for nostalgia, but mostly for the joy in seeing them grow. ~ David Hobson

For the past several days I have been working on expanding the garden. I know, I have proclaimed from the beginning that I am not a good gardener and as far as a green thumb, mine is black, but the gardening bug has taken hold and taken hold good.

Since deciding to revamp the entire garden, allowing the soil to recoup from three consecutive years of planting potatoes, my plans have mushroomed every time I visit a garden center. First I decided to try growing peppers; then having planted the peppers where I used to grow tomatoes, I thought I’d give planting tomato plants in pots a try; then I built an a-frame to grow my own pickles; next I planted kale and broccoli under the a-frame and Brussel sprouts, acorn squash and zucchini in the other half of the main garden. When will enough be enough?

NEVER! So thinking bigger yet, I decided to expand the garden by a little more than a 1/3 so I could plant beets, carrots and if there’s room, beans — all things I will be able to can, pickle, or freeze. I get all tingly just thinking about it.

Anyway, three days ago I started my project. The first step was to remove the sod that has covered that area for the past 20 years. A sod cutter is a girl’s best friend!

Day 1 – I started the back-breaking chore of removing the grass. After a little more than an hour I came close to clearing half the area I set out to do. The work was harder than I remembered removing sod to be. Either I’m getting old, or grass is getting stronger — I’ll go with the grass is getting stronger.

This is the area I needed to clear of sod.

This is the area I needed to clear of sod.

Day 2 I finished clearing the sod, bagged it for garbage day, and admired my work. There is something to be said for completing a strenuous task. Even my hubby was impressed with my quick progress, so much so, that he actually volunteered to help me with the next step – framing the garden.

This is the area when it was nearly half cleared.  Note I used the brick to help remove some of the dirt from the sod.

This is the area when it was nearly half cleared. Note I used the brick to help remove some of the dirt from the sod.

Day 3 – Off to Home Depot we went to pick up two landscape timbers and four 12“ spikes to secure it to the ground. What would have taken me probably three times as long, hubby managed to finish in 15 minutes.

The completed clearing and framing job.  Now I just need to get some dirt to fill it.

The completed clearing and framing job. Now I just need to get some dirt to fill it.

Doesn’t it look awesome? It might not be too impressive, especially since I don’t have any dirt for it yet, but that’s coming. Hubby went on Craig’s List and found some top soil for a good price including delivery. I’m trying to get that delivery scheduled for Thursday. A yard of dirt will be more than enough to fill the area and I’ll have lots leftover to fill more pots to attempt yet another gardening project I learned about today — planting tomato suckers (more on that in another post).

With the new garden well on its way to completion I decided to do some research on how to make sure my pepper plants remain healthy and fruitful. I learned today that “topping” pepper plants helps them to yield more peppers. In between the rain this afternoon I cut all the branches below the main “V” of the plants. They don’t look as pretty, but hopefully they will be healthier.

One reason that I am so excited about gardening this year is that it isn’t even June and already the plum tree has tiny plums, the Roma tomato plants I planted have tiny tomatoes, and the pepper plants have tiny peppers.

This slideshow requires JavaScript.

This early promise of a bountiful harvest is so heartening. For the moment I almost feel like I might be able to do this, and do it right/well, and for this I am — Simply Grateful.

Kiwi-Lime Jam

Over the winter I spent many months looking for recipes of jams that I could make that did not require “fresh” fruit. Living in Michigan, the best months for canning are typically June through October, when local fruits and vegetables are harvested. I know I could buy almost any fruit or vegetable that is brought in from other parts of the country year round, but I look forward to canning the fresh Michigan produce I pick myself, grow myself, or can get from local farmers.

Surprisingly, I found quite a few jams, jellies and preserves that I could make during the winter and was able to make good use of my time during those long, cold days of January through March. One of my favorite jams that I discovered was a Kiwi-Lime Jam. With just a few ingredients, I was able to make a refreshing jam that reminded me of the tropics.  The recipe didn’t make a ton of jars, which I like, it gives me the opportunity to make it again.

Kiwi-Lime Jam

Kiwi-Lime Jam

Checking my inventory of jams in the pantry, I discovered that already we were down to our last jar, so today I worked on a batch. I changed the recipe slightly because I wanted a softer-set jam and wanted  to use some of my apple-pectin stock. I’ll include both recipes, depending on what type of set you prefer. The Certo pectin recipe will give you a very firm set, what I consider a jelly-set. The apple-pectin stock version offers a pourable product that could easily be used as a syrup as well as a spread.

Kiwi-Lime Jam (Soft-Set)

6 Kiwi, peeled and thinly sliced or chopped
3 Cups Sugar
6 oz. Unsweetened Pineapple Juice
Zest and juice of 1 Lime (make sure you have enough juice to measure 1/4 Cup)
1/2 Pint Apple Pectin Stock

Peel and slice kiwi.

I used a mandolin to slice three of the kiwi and then chopped the remainder.

I used a mandolin to slice three of the kiwi and then chopped the remainder.

Zest lime then squeeze out juice, adding additional bottled lime juice to measure 1/4 cup if necessary.

Zest lime, trying not to get any of the white pith.

Zest lime, trying not to get any of the white pith.

Juice lime, adding enough bottled lime to juice to measure 1/4 cup.

Juice lime, adding enough bottled lime to juice to measure 1/4 cup.

Combine kiwi, lime zest and juice, pineapple juice, sugar and apple pectin stock in pan.

Combine all ingredients in large stock pot.

Combine all ingredients in large stock pot.

Bring to full rolling boil.
Turn down to medium and boil for 15 minutes.

Watch jam carefully, so it doesn't stick or scorch.

Watch jam carefully, so it doesn’t stick or scorch.

Remove from heat and let sit for 5 minutes.
Ladle hot jam into hot sterilized jars.
Cover and place jars in water bath canner.
When canner reaches a full rolling boil, process for 10 minutes.

Kiwi-Lime Jam (Firm-Set)

6 Kiwi, peeled and thinly sliced or chopped
3 Cups Sugar
6 oz. Unsweetened Pineapple Juice
Zest and juice of 1 Lime (make sure you have enough juice to measure 1/4 Cup)
1 Pouch Certo Liquid Pectin

Peel and slice kiwi.
Zest lime then squeeze out juice, adding additional bottled lime juice to measure 1/4 cup if necessary.
Combine kiwi, lime zest and juice, pineapple juice, and sugar in pan.
Bring to full rolling boil.
Boil for 1 minute.
Add pectin.
Return to boil and boil for 1 minute.
Remove from heat and let sit for 5 minutes.
Ladle hot jam into hot sterilized jars.
Cover and place jars in water bath canner.
When canner reaches a full rolling boil, process for 10 minutes.

DSCF1670

I am so glad I researched new jams to try this past winter. This particular one is by far one of the favorites I made and can be made during those months that aren’t filled with local fresh produce canning, and for this I am — Simply Grateful.

Taste of Summer

For weeks the sounds of summer have been declaring their triumphant return. Birds chirping from morning till night, children laughing and playing outside, lawn mowers whirling across lush lawns, shades thumping against window frames as warm breezes stream through open windows, sprinklers spraying mists of water on freshly planted gardens, bees buzzing while they fly from flower to flower pollinating our plum tree, and morning doves cooing from their perch on top of our house. Loud and clear the sounds of summer scream — We’re back!

For the past couple weeks the scents of summer have been slowly making themselves known after a long, hard winter. The intoxicating blossoms on the plum tree, the sweet lilacs, just-cut grass, freshly tilled soil, Bell after rolling in that awful smell in the grass, barbecues sizzling in my neighbors yards, the rain as it hits the warm pavement, and bonfires blazing in our backyard. So many wonderful smells that scream — It’s nearly summer!

For nearly a week the sights of summer have overtaken our neighborhood after many false starts and stops. Thick droplets of morning dew covering the grass, plum blossoms falling away to make room for lush green leaves, patio furniture uncovered, weeds popping up in flower beds, dawn breaking early and dusk coming late, convertibles cruising down the road with their tops down, and backyard pools being opened. Everywhere I look the scenery screams — Time to get out and enjoy!

For all the sights, sounds, and scents of summer that have revealed themselves proclaiming their return, the one aspect of summer, my favorite aspect of summer, had yet to return — the tastes of summer. There are some very distinct foods and drinks that for me are the epitome of summer and what I miss most when fall slowly reclaims its reign. Fresh squeezed lemonade, beef jerky in the smoker, frozen treats from the ice cream truck, barbecue ribs on the grill, home-grown vegetables from the garden, fresh picked strawberries, roasted corn on the cob, and home-brewed sun tea. These are undeniable tastes that scream — Summer is here!

The one taste of summer that I most look forward to is fresh fruit salad. This weekend the first fresh summer fruits of the season became available — watermelon, cantaloupe, grapes, and strawberries — everything needed for the most refreshing dessert ever created.

The tastes of summer!

The tastes of summer!

Today I made the first of many fruit salads for the Summer of 2014. The watermelon was juicy, the cantaloupe tender, the grapes crisp, and the strawberries sweet, a perfect combination to begin our summer, and for this I am — Simply Grateful.

Baltic Amber Stress Relief

A couple of months ago Gracie came home from work raving about Baltic amber and the healing qualities and health benefits it promised. Just to name a few of the possible benefits — migraine, sinus, body ache, stress, and anxiety relief. Not necessarily believing something as simple as pure amber could deliver on even half of what it promised, we did some research on the Internet.

Although there wasn’t a whole lot of information on Baltic amber, other than the typical sales pitch, Gracie was convinced this would help her immune system fight off the constant ailments she faces at school and work. So, I ordered us each a Baltic amber bracelet from Amazon.

DSCF1659

We have both been wearing these bracelets for about two months. I’m not sure I’ve noticed anything different because I control my migraines, stress, anxiety, and sinus issues with raw milk and my morning coffee. I have noticed, however, my stress levels do seem to be very low, so maybe it is picking up where the milk and caffeine leave off.

This morning after an especially stressful conversation with my mother on the phone which left me literally shaking, Gracie and I headed out on some errands. We finished our errands then decided to enjoy the sunshine by walking around a local outdoor mall.

As we strolled in and out of stores Gracie asked, “How is your amber bracelet working out for you?”

“I think okay.” I answered.

“Does it help with your stress and anxiety?” she continued.

“Well, you saw how well it helped when I was talking to your grandmother.”

Scoffing she replied, “It’s not a miracle worker, Mom!” We both laughed.

This was one of those special mother/daughter moments where laughter is truly the best medicine. I don’t know if the Baltic amber has any effect on the stresses in my life, but Gracie sure does. My stress level fell, the anxiety drained from my body, and the rest of the day each time I looked at my bracelet, I smiled, and for this I am — Simply Grateful.

Dew Drops

The dew, “Tis of the tears which stars weep, sweet with joy.

                                                      ~ Philip James Bailey

DSCF1156 DSCF1155 DSCF1154 DSCF1151 DSCF1159

Dew clinging to the tomato plants:

This slideshow requires JavaScript.

The morning is always so full of things to be thankful for, and for this I am — Simply Grateful.

Lilacs A-Blooming

The last few days have been picture-perfect here in Michigan — warm, sunny, and no rain, it doesn’t get much nicer.

With all the sun and warmth, the lilacs are pretty much in full bloom.  Just walking on the side of the house where they grow, you are consumed by their fresh, sweet scent.

Image

I don’t understand why lilacs last for such a short period of time.  Although they have been “blooming” for about a week, they just reached full bloom when their scent becomes inescapable and will probably begin to wither and die by the weekend.

Image

Image

Knowing that they will last only for a few short days, I took the opportunity today to pick two bouquets.  The first went to a neighbor who recently got out of the hospital and the second went up in my daughter’s room.  It is a surprise for her when she gets home from work.

Image

Summer is right around the corner.  It is so close you can smell it, and not just in the blooming lilacs, and for this I am — Simply Grateful.

You Know You’re In American When…

“I’ve learned that I should never praise my mother’s cooking when I’m eating something fixed by my wife.” – Age 27 Anonymous, page 28, Live & Learn & Pass It On

Coming up with something original to make for dinner 365 days a year is not an easy task. It is downright stressful. Even with a stockpile of recipes to go three months without repeating a single meal, I sometimes want a break from the old meat and potatoes or meals inspired from around the world. Sometimes I just want something simple and quick.

When I got married some 20+ years ago, my hubby didn’t say a whole lot about my cooking. He would say it was “good” or that he liked it, but wasn’t one to gush. I learned with him the less he said the better because he was the first to point out if something wasn’t right or God forbid — his mother didn’t make it like that or … wait for it … you guessed it “My mother really makes good ________ (fill in whatever I had made for dinner that night).

I can tolerate quite a bit, but being compared to his mother, well I draw the line there. My rebuttal was always the same, “Then maybe you should have her make it for you!” And that meal was wiped from my menu permanently. No I wasn’t bitter, just not in the mood to be compared to someone who told me after my husband and I got engaged, “It would be so much nicer if he’d marry someone Serbian.” Yeah, in the 45+ years my in-laws have lived here, they have not accepted Americans in the least.

For the most part, my husband is all-American. He has been here since he was a young boy so has assimilated the American ways, but many of the old traditions and values remain. One such instance of this was made apparent to me when I served hot sub sandwiches for the first time for a dinner. This is one of those quick and easy meals I love to make when I’m tired of spending hours in the kitchen day after day. Being that it was hot, filled with meat, and served with a side of homemade potato salad, I figured it could squeak by for dinner.

With my hubby sitting at the table, waiting for me to serve dinner, I casually walked to the table and placed a Corning Ware dish filled with hot sub sandwiches on the table. He looked at it, pierced his lips, shook his head, and said, “You know you’re in American when you get served sandwiches for dinner.” I won’t get into what happened next, but lets just say, the meal was spent in silence and for years I never attempted to serve “sandwiches” for dinner again.

After so many years of marriage I believe I have earned the right to serve whatever I want on occasion, without regard for what darling hubby wants. He gives no help in the kitchen, offers no suggestions for meals, and is dead-set against eating out more than once or twice a year. I believe this gives me cart blanche when it comes to deciding whether or not I’m going to serve sandwiches for dinner.

Time has a funny way of mellowing people. Now-a-days, hubby has been known to suggest every once in a while that I make some sort of sandwich for dinner. It might be because it’s too hot to crank up the old stove, we might have been out all day and don’t have much time to make something before we pass out from hunger, or dare I say, he actually has a few “favorite” sandwiches that he enjoys having for dinner.

One of his favorites, as well as the rest of the families is a roasted turkey with peppers and onions sub. I made these yesterday after spending too long in the sun working outside. I didn’t saute any peppers, only onions, but it was delicious just the same. Served with homemade pickles and pickled peppers, two sandwiches for a grown man is plenty. I barely choke down one.

Roasted Turkey Sandwiches with Peppers & Onions

  •  Deli Sliced Turkey (I used both turkey and ham yesterday)
  • Cheddar Cheese Slices (I added a little Fiesta Jack cheese as well)
  • Garlic Powder
  • Vedalia Onion (2)
  • Yellow, Red, or Orange Bell Pepper (1)
  • Sub Rolls

Toast rolls.

Toast rolls and assemble ingredients.

Toast rolls and assemble ingredients.

Place five to seven slices of deli turkey on half of roll (how many will depend on how thick the meat is sliced).

Put sliced deli meat on rolls and sprinkle with garlic powder.

Put sliced deli meat on rolls and sprinkle with garlic powder.

Sprinkle with garlic powder.
Cover meat with one to two slices of cheese.

Top with cheese.

Top with cheese.

Saute onions and peppers in butter until tender. Drain and put on top of cheese.

Drain sauted onions and put on cheese.

Drain sauted onions and put on cheese.

Top with other half of sub roll, place in Corning Ware pan, cover with foil and bake for 15-20 minutes at 350°.


Cover with foil and bake for 15 minutes.

Cover with foil and bake for 15 minutes.

DSCF1454

Marriage is a learning process that begins with the first date and lasts for a lifetime. Getting your footing can be challenging, but once you get your stride and everything calms down, life is good, and sandwiches pass for dinner, and for this I am — Simply Grateful.